Sometimes I feel that the world of baking has gotten out of control. In search of something new and exciting, increasingly more magazines, cookbooks, and yes, even blogs, have been showcasing excessively "decadent" (read: overdone) dessert recipes. I love a bit of indulgence just as much as the next person, but when I'm beseiged by a horde of Triple Chocolate Caramel Fudge monstrosities, my taste buds shrink in fear.
There's an entire new genre of such baked goods, whose descriptions seem the baking equivalent to letting 4-year-olds pick their own names. Only instead of a world of Princess Rainbow Unicorns and Optimus Michaelangelo Squarepants (forgive the gendered examples), you're left with Banana Berry Brownie Pizza and Coconut Marshmallow Cream Meringue Pie.
So when I glanced at the many varied ingredients for these cookies, I was instantly suspicious. Peanut butter, espresso powder, chocolate, oats, AND hazelnuts? But I was surprised to find that it all came together very nicely in a large, chewy cookie with the air of a regular chocolate chip cookie who just returned after hitchhiking through Western Europe -- simultaneously more worldly (the espresso powder and hazelnuts) and more down-to-earth (the peanut butter and whole wheat flour). I can't quite explain it, but if you're looking for a tasty cookie that doesn't blast your brains out with sweetness, give this a try.
Hazelnut Mocha Cookies
Adapted from Better Homes & Gardens' Christmas Cookies Magazine, 2008
Ingredients:
1 TBS instant espresso powder
1 TBS water
1 1/2 cups smooth peanut butter
1/2 cup butter, softened
1 1/2 cups brown sugar, packed
1 1/2 tsp baking soda
1/4 tsp salt
2 eggs
1 1/8 tsp vanilla
1 1/2 cups regular rolled oats (I use old-fashioned)
1/2 cup whole wheat flour
1 cup dark chocolate pieces (I use ~5 oz chopped bittersweet chocolate)
1 cup hazelnuts, toasted and chopped
To toast hazelnuts:
1. Preheat oven to 350 degrees, F. Spread nuts in a single layer in a shallow baking pan (or on a baking sheet lined with foil).
2. Bake nuts for ~10 minutes (or ~14, if the nuts were stored in the freezer), stirring once.
3. Place the warm nuts on a clean kitchen towel. Rub the nuts with the towel to remove the loose skins. Let cool and chop. Set aside.
To assemble and bake cookies:
1. Preheat the oven to 350 degrees, F. In a small bowl, stir together espresso powder and the water until powder dissolves; set aside.
2. In a large bowl, combine butter and peanut butter with a wooden spoon until well mixed. Add brown sugar, baking soda, and salt. Beat until combined. Beat in eggs, vanilla, and espresso mixture until combined. Beat in oats. Beat in flour. Stir in chocolate pieces and hazelnuts.
3. Drop dough from a 1/4 cup measure (I roll it into balls), 3 inches apart onto an ungreased cookie sheet (line them with parchment paper for ease of clean-up); press each ball slightly.
4. Bake for 13 to 15 minutes, or until edges are lightly browned. Be careful not to overbake. Cool on cookie sheet for ~2 minutes. Transfer cookies to a wire rack; let cool.
Yield: ~24 mondo-large cookies.
To store: Layer cookies between sheets of wax paper in an airtight container; cover. Store at room temperature or freeze for up to 3 months (and when you're ready to serve them, let them thaw on the counter for a few hours until they come to room temperature).
Saturday, December 20, 2008
Sunday, December 14, 2008
Cookie Extravaganza, Part I: Finska Pinnar
Christmastime is a season of giving, of loving, and appreciating. But most of all, it is a season of baking cookies until you reach the point of collapse. Or at least, that's how it's always been at my house. Every year, the kitchen would transform into a cookie factory in the days leading up to the holiday. And while the baked sweets were of course delicious and exceptionally pretty, they were also a mechanism of extraordinary power. For everyone knows that the better your cookies are, the more Santa will recognize how good you've been.
No one was more cognizant of this power than she who wielded it, the great Baker of Cookies and High Priestess of the Altar of the Claus. Or as we like to call her, Mom. One of my earliest Christmas memories was of being in kindergarten, executing a homework assignment to write a letter to Santa. These letters would presumably be sent to the North Pole upon completion, though how my teacher had an in with the big guy I never quite understood.
So there I was, sitting at the table, writing on the scratchy-as-pure-wood-shavings recycled paper they give to 5 year-olds, and wondering what I wanted. I decided I wanted a pet snake (don't ask). I believe I was reading it to my mom as I was writing, indicating that for Christmas I would please like "a snake and snake food." After the slightly dismaying revelation that "snake food" consists of live rodentia, I was a little disgusted, but undeterred. Until Mom uttered the fatal words: "If Santa brings you a pet snake, I'm never baking him another cookie again." And suddenly -- poof! -- desire for a snake, gone!
I don't remember what it was I asked for instead, but I remember feeling no remorse, knowing that it was much better to pick one of the many other things that would make me happy than to jeopardize my standing up at the Pole. And now that I'm old enough to bake my own cookies (and old enough to know that a pet snake is a terrible idea for a kid as flighty as I was), I like to think of the delicate sugared butter cookies I make each year as both a bringer of joy and a bringer of peace. Joy to the kids I may someday have, who will hopefully (thanks to the cookies, of course) get what they want... and peace to me, should I ever need to wield my power if they ask for something similarly absurd/dangerous.
Cookie Summary:
A butter cookie topped with crystal sugar, this recipe is simple and delicious. There are no leavening agents added, and although the dough calls for egg yolk only, the decoration makes use of the egg white so nothing goes to waste. They are labor-intensive, in that the dough needs to chill and that it's a bit hard to work with when first removed from the fridge. But their taste makes them a standard in my family every year, and I don't mind the trouble when I get to pop a few into my mouth as a reward.
Finska Pinnar
Adapted from a recipe in the Los Angeles Times, with Mamafications
Yield: ~ 4 dozen small cookies
Ingredients:
1/2 lb. butter, softened (2 sticks)
1/2 cup sugar
1 egg, separated
1/2 tsp. vanilla extract
2 1/4 cups flour
coarse "pearl" sugar (I like this kind, which can be found at Ikea)
crystal sugar of the colors of your choice
Directions:
1. In a large bowl, beat butter with a wooden spoon or mixer until creamy.
2. Beat in sugar and egg yolk (set egg white aside and refrigerate in a bowl, beneath plastic wrap). Add vanilla and mix in until combined.
3. Gradually work flour into the mixture to form a dough (I do it in about 3 or 4 parts).
4. Chill the dough for at least 2 hrs. Can be chilled up to 24 hours.
When you're ready to roll the dough:
Set out: baking sheets, parchment paper, wax paper for your work surface, pearl sugar, colored sugar, reserved egg white, a pastry brush, spoon, butter knife, and a bowl or shallow dish with sides
Preheat oven to 350 degrees F.
5. Lay out wax paper on a work surface and line baking sheets with parchment paper. Use a regular teaspoon to carve out smaller pieces of the big chilled chunk of dough to make it easier to work with. Using a few bits at a time (a small handful), quickly soften the dough slightly by kneading it between your fingers and palms. Then roll dough into ropes about 1/2" in diameter (these can be long or short, but I find making longer ones speeds up the decorating process) on the wax paper. Do not flour your surface, or your cookies will become dry. Wax paper will prevent sticking.
6. Set out the bowl or a shallow container with sides at least 1" high and mix a bit of the colored sugar with the pearl sugar. Use your discretion -- don't use all your colored and pearl sugar at once because they'll probably get dirtied with egg white.
7. Using a butter knife, cut the dough ropes into lengths about 1" long (about the length of your thumb). Use a pastry brush dipped in the egg white and lightly brush the tops of each of the pieces.
8. Before the egg white dries on the dough, dip each of the brushed pieces in the sugar mixture and place them on the lined baking sheet, with at least 1 " between them.
9. Baking one sheet at a time, bake the cookies for 15 to 20 minutes, or until the ones on the edge of the pan are SLIGHTLY golden at the edges. IT IS VERY EASY TO BURN THESE, so if your oven tends to run hot, check them instead at 13 minutes first. A good rule of thumb is to judge the smell -- when your kitchen starts to smell like cookies, that's a sign you should start preparing your cooling racks.
Thursday, August 28, 2008
Quakers
I have always marveled at the way that children are quick to form their own societies. I don’t mean in a “Lord of the Flies” sort of way, though I know there’s an aspect of that on every playground. No, my particular point of fascination is the way children form systems of exchange.
Nowhere else are these systems more prevalent than in elementary school cafeterias. Each item in one’s lunch has two possible kinds of utility: the utility you’ll get from consuming it yourself, and the utility it will bring when bargaining with the other kids for something better. The value of some items depends greatly on the market – in a sea of children with health-obsessed parents, something as plain as a cinnamon graham cracker could be the gold bullion of one’s lunchbox – but others have intrinsic absolute value. And at the top of this list are homemade cookies, especially those speckled with chocolate.
But oddly enough, I have no recollections of chocolate chip cookie exchanges because these featured cookies were my greatest form of currency. My mom’s combination of oats, walnuts, and coconut seems an unlikely favorite with kids – especially with ones as picky as I used to be. But I promise you on the sanctity of memory and the red Pound Puppies lunchbox I held so dear, these were exceedingly popular. And every time I make them, I secretly feel as though I’m operating my own private mint.
Quakers
Adapted from an Old Sturbridge pamphlet of cookie recipes
Ingredients:
2 cups dark brown sugar
1 cup shortening
2 eggs, beaten
2 cups sifted flour
3 cups rolled oats
1 ½ tsps. soda
1 tsp. salt
2 tsps. vanilla
1 cup shredded coconut
¾-1 cup chopped walnuts
Directions:
1. Preheat your oven to 375 degrees F.
2. Cream together the sugar and shortening in a large bowl using a wooden spoon.
3. Add beaten eggs and vanilla.
4. Sift flour with soda and salt, stir in oats, and stir in the dry ingredients into the batter. Beat well.
5. Add the coconut and walnuts and mix into the batter with a wooden spoon.
6. Put ¼ cup sugar into a small bowl. Dip fingers into the sugar, then pinch off a bit of dough and roll it to the size of a walnut (so says the original recipe – I make mine more slightly larger, about 1.25 inches in diameter). Dip the ball into the sugar.
7. Place balls on a cookie sheet lined with parchment paper, about three inches apart. Press on each ball to flatten a bit with the palm of your hand.
8. Bake for 12-15 minutes.
Yield: ~4 dozen cookies
Tuesday, July 29, 2008
Blackberry-Peach Slump
I believe that anyone who’s ever baked has some negative history with one particular baked good. I don’t mean one cookie that turned out lousy in a batch of 5 dozen – I mean one category of product that has consistently turned out disappointing. Or rather, I should be more frank: a product that always seems to end up a failure of epic proportions. Several years ago, my sister and aunt had just such a tempestuous relationship with Tarte Tatin. I’m not exactly sure what sparked the obsession, nor do I remember how many attempts they made. Just know that I have numerous memories of the two of them baking the tarts and no memories of eating the tarts. And when I’m not eating, you know it’s a bad sign.
I myself have had a similar relationship with cobbler. Although I’ve tried my hand at what feels like several versions, I have yet to have one come out right. Part of it has to do with the size of the pan I use, part of it has to do with my incompetence – but I like to think a great deal of it comes from my lack of an old passed-down-for-generations family recipe imbued with secrets that impart deliciousness upon a rather humble dessert.
Whatever the reason, my repeated failures caused me to create what I call the Cobbler Mystique: “I can do cookies, no problem! Cakes, okay! Cobbler – get someone else to do it!” The ultimate shame of course, is that I love eating cobbler. Wonderful use of fruit, a biscuity layer to contrast the sweetness and add a little texture, and it’s the perfect baked expression of summer.
So when a friend came over and we were thinking of trying something that involved fresh summer fruits, cobbler was the first thing that came to mind. I tried to suppress it, the thought of my past humiliations seeping over my brain like The Blob at that oddly crowded movie theater, but to no avail. It was the clear choice. Until he (my baking partner, not The Blob) showed me a recipe he’d found for “Blackberry-Peach Slump.” I read through the recipe a few times. It was all there: the use of fresh fruit, summery ingredients, a biscuity top. If it looks like a duck, walks like a duck, and quacks like a duck, it must be a cobbler, right? But no! It was a Slump! Whatever that is!
Suddenly, my fears dissipated, and those countless cobblers that were almost burned at the edges and raw in the middle faded as if from a long, drawn-out nightmare. We tried the recipe and it came together easily and enjoyably. With minimal modifications, we produced what I feel to be one of the greatest Slumps the world has ever seen. (Insert pun about a Slump coming from my cobbler slump here.) So if you’ve been having similar doubts, doubt no more. I may not be able to make a cobbler to save my life, but I guarantee this Slump recipe will make you feel pret-ty good about yourself – whether or not you deserve it.
Notes:
- I didn’t know what size pan to use, so I chose a standard rectangular cake pan and just added more fruit. My embarrassing admission is that I have no idea how much fruit I added, but I believe it was at least half a cup. When you mix the filling together, you’ll have quite a bit of juices, so it won’t hurt to add more fruit without adding more of anything else. Eyeball it.
- Vanilla beans are insanely expensive. I lacked them at the time, so I just added a teaspoon of vanilla extract instead when mixing the filling. If you’re determined to use vanilla beans though, buy them at Costco if possible – they’re much cheaper there than at specialty stores like Sur La Table.
- Make sure to keep the thickness of the biscuit discs uniform to ensure even baking. If your oven is notoriously inconsistent, I might remove and turn the tray around in the middle of baking.
- We used a combination of blackberries and raspberries to use with the stone fruit.
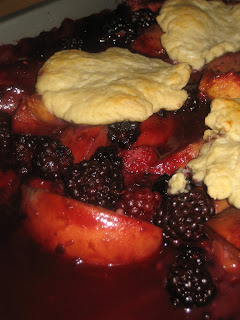
- The photos include both "before" and "after" baking pictures. I'm sorry they're bad -- the lighting in my kitchen is less than optimal. As are my photography skills.
Tuesday, July 22, 2008
Oatmeal Raisin Cookies
There's a scene in The Giver (required reading for all 12 year-olds) where the protagonist is looking at an object, and suddenly it changes somehow. At first, you have no idea what's going on, until you realize that the boy has learned to see in color -- up to this point, he has been living in black and white.
Well, several hours, 5 cups of oats, 4 sticks of butter, and countless dishes later, I realized I had churned out about 5 dozen oatmeal raisin cookies. Five dozen cookies now sitting in my apartment. Where I live. Alone. And if that wasn't enough, the kicker was sitting on my living room floor -- a 9-pound box of Quaker Oats that I'd bought earlier that day. In fact, the act of purchasing it hadn't even seemed strange to me at the time. After all, a lunatic feels no shame at his lunacy; he doesn't think he's crazy.
I, on the other hand, know as I glance at that 9-lb box of oatmeal (now already less than 9 lbs, as I used quite a bit of it), that I have entered a Brave New World of baking. Now that I've tasted the sweetness of unmitigated baking fascination, I can't go back. And I don't think I'd ever want to.
Recipe notes:
- I am posting the recipe of the "better" cookies below, though my office mates preferred what I thought turned out to be the unsuccessful batch. The other recipe yielded products that tasted more like candy than cookies to me -- all butter and sugar, a caramelized flavor, but slightly greasy and too spread out and lacking a good taste to the dough part of the cookie. If you're still interested in them though, let me know and I'll get you the recipe
- I added walnuts to this recipe because who wants an oatmeal raisin cookie without nuts?! Except for those who are allergic, and to you I say: I am so, so sorry.
- I also added vanilla. To me, a cookie without vanilla is like my life without baking, which is to say generally drab, boring, and other words that mean the same thing -- un-fun.
- The resulting cookies were slightly crispy on the outside and chewy on the inside! Hooray! They had a great oat-y flavor and the nutmeg really complimented the oats nicely. Though I do think they could also benefit from a little cinnamon. On the whole, a delightful (albeit pale) cookie, and one I will certainly make again.
Oatmeal Raisin Cookies
Adapted from The America’s Test Kitchen Family Cookbook
1 ½ cups all-purpose flour
½ tsp. baking powder
½ tsp. salt
¼ tsp. nutmeg
16 TBS (2 sticks) unsalted butter, softened
1 cup packed light brown sugar
1 cup granulated sugar
2 large eggs
3 cups old-fashioned oats (instant oats won’t taste as good)
1 ½ cups raisins
1 ½ cups chopped walnuts
1 tsp. vanilla
Directions:
1. Preheat the oven to 325 degrees F.
2. Whisk the flour, baking powder, salt, and nutmeg together in a medium bowl. Set aside.
3. In a large bowl, combine butter and sugars with an electric mixer or by hand with a wooden spoon until light and fluffy. Beat in the vanilla.
4. Beat in the eggs one at a time, mixing until combined.
5. In three parts, slowly mix in the flour mixture with a wooden spoon until just combined. Mix in the oats, raisins, and walnuts until just incorporated.
6. Using a regular dinner spoon to help you scoop out the dough, shape large/medium balls with your hands (~2 TBS) and place them on parchment paper on your baking sheets, ~ 2 ½ inches apart. Flatten each one a bit with the palm of your hand.
7. Place 2 baking sheets in the oven at a time and bake for 22-25 minutes, making sure to switch and rotate the trays halfway through the total baking time. Remove from oven when the cookies are lightly golden but the centers are still soft and puffy.
8. Let the cookies cool on the baking sheets for 10 minutes, then serve warm or transfer to a wire rack to cool completely.
Yield: ~ 32 cookies
Life seems to be full of such moments when, as Obi-Wan once said, you realize you've taken your first step into a larger world. I had such a moment this past Sunday. For some reason, I got it into my head that it would be a good idea to bake two different batches of oatmeal raisin cookies from two different recipes. At first, it made complete sense -- I didn't like the products of the first recipe, so I tried a second one. Logical, right?
Well, several hours, 5 cups of oats, 4 sticks of butter, and countless dishes later, I realized I had churned out about 5 dozen oatmeal raisin cookies. Five dozen cookies now sitting in my apartment. Where I live. Alone. And if that wasn't enough, the kicker was sitting on my living room floor -- a 9-pound box of Quaker Oats that I'd bought earlier that day. In fact, the act of purchasing it hadn't even seemed strange to me at the time. After all, a lunatic feels no shame at his lunacy; he doesn't think he's crazy.
I, on the other hand, know as I glance at that 9-lb box of oatmeal (now already less than 9 lbs, as I used quite a bit of it), that I have entered a Brave New World of baking. Now that I've tasted the sweetness of unmitigated baking fascination, I can't go back. And I don't think I'd ever want to.
Recipe notes:
- I am posting the recipe of the "better" cookies below, though my office mates preferred what I thought turned out to be the unsuccessful batch. The other recipe yielded products that tasted more like candy than cookies to me -- all butter and sugar, a caramelized flavor, but slightly greasy and too spread out and lacking a good taste to the dough part of the cookie. If you're still interested in them though, let me know and I'll get you the recipe
- I added walnuts to this recipe because who wants an oatmeal raisin cookie without nuts?! Except for those who are allergic, and to you I say: I am so, so sorry.
- I also added vanilla. To me, a cookie without vanilla is like my life without baking, which is to say generally drab, boring, and other words that mean the same thing -- un-fun.
- The resulting cookies were slightly crispy on the outside and chewy on the inside! Hooray! They had a great oat-y flavor and the nutmeg really complimented the oats nicely. Though I do think they could also benefit from a little cinnamon. On the whole, a delightful (albeit pale) cookie, and one I will certainly make again.
Oatmeal Raisin Cookies
Adapted from The America’s Test Kitchen Family Cookbook
1 ½ cups all-purpose flour
½ tsp. baking powder
½ tsp. salt
¼ tsp. nutmeg
16 TBS (2 sticks) unsalted butter, softened
1 cup packed light brown sugar
1 cup granulated sugar
2 large eggs
3 cups old-fashioned oats (instant oats won’t taste as good)
1 ½ cups raisins
1 ½ cups chopped walnuts
1 tsp. vanilla
Directions:
1. Preheat the oven to 325 degrees F.
2. Whisk the flour, baking powder, salt, and nutmeg together in a medium bowl. Set aside.
3. In a large bowl, combine butter and sugars with an electric mixer or by hand with a wooden spoon until light and fluffy. Beat in the vanilla.
4. Beat in the eggs one at a time, mixing until combined.
5. In three parts, slowly mix in the flour mixture with a wooden spoon until just combined. Mix in the oats, raisins, and walnuts until just incorporated.
6. Using a regular dinner spoon to help you scoop out the dough, shape large/medium balls with your hands (~2 TBS) and place them on parchment paper on your baking sheets, ~ 2 ½ inches apart. Flatten each one a bit with the palm of your hand.
7. Place 2 baking sheets in the oven at a time and bake for 22-25 minutes, making sure to switch and rotate the trays halfway through the total baking time. Remove from oven when the cookies are lightly golden but the centers are still soft and puffy.
8. Let the cookies cool on the baking sheets for 10 minutes, then serve warm or transfer to a wire rack to cool completely.
Yield: ~ 32 cookies
Saturday, July 19, 2008
Chocolate Chip Cookies, Episode II
The New York Times recently ran an article about chocolate chip cookies, touting that they had come upon the Holy Grail of chocolate chip cookie recipes. The food blog Serious Eats had a similar article about this. The internet is filled with the legends about the $250 cookie recipe, or debates about whether a chocolate chip cookie should be chewy or crispy or perhaps even a little bit of both. People have really torn each other to pieces over this topic. Did Ruth Graves Wakefield accidentally drop a bunch of chocolate pieces into her batter, or was it the purposeful act of a genius who would change our lives forever?
As far as I'm concerned, the swirling rumors and historical inaccuracies tend to add complexity to perhaps the greatest aspect of the chocolate chip cookie -- its simplicity. I doubt the world will ever agree upon which recipe is "best," considering that I am hard-pressed to think of another topic upon which we all agree. So you can take your panel of "chocolate chip cookie experts" and food historians and cookie chemists and the whole lot. I am not an expert, but I am looking for a cookie that:
- Is chewy in texture (due to the ingredients and techniques rather than to simple underbaking)
- Has some caramel/toffee notes in it
- Does NOT skimp on the chocolate or insist that it be in enormo-chunks or perfectly factory-ized chips
- Puffs up just a bit instead of being flat and runny
- Does not have nuts, but would be perfectly wonderful with the addition of something like walnuts or pecans
- Is large enough to feel substantial in your hand but NOT large enough to feed a small nation
In my ongoing quest to hit upon the perfect recipe to yield the cookie detailed above, this recipe is the closest I’ve yet come. I posted one version of this recipe before, but the one thing the NYTimes article imparted upon me was that the "chill the dough first" strategy was one worth exploring. I made a double batch of these (because my recipe usually yields a measly 2 dozen cookies), and, so sayeth Dinah Washington, "What a difference a day made." I mean, really. I couldn't be bothered to chill the batter for 36 hours -- what an odd period of time -- but a bit less than 24 hours seemed to do just fine. Oh and don't begin to be impressed, I did not come up with this recipe out of my little brain. It is a modified version of the Neiman Marcus one posted online at their website.
Chocolate Chip Cookies, v 2.0
Ingredients:
½ cup (1 stick) butter, softened
1 cup light brown sugar
3 TBS granulated sugar
1 large egg
2 tsps. vanilla extract
1 ¾ cups all-purpose flour
½ tsp. baking powder
½ tsp. baking soda
½ tsp. salt
1 tsp. instant espresso powder
1 ½ cups (~9 oz) chopped bittersweet chocolate
Directions:
1. Cream the butter with the sugars using a wooden spoon. Mix until homogenous.
2. Beat in the egg and vanilla extract with the wooden spoon. Add espresso powder and mix until evenly distributed.
3. In a separate bowl, combine flour, salt, baking soda, and baking powder with a wire whisk.
4. Slowly add dry ingredients to wet ingredients in three parts and use wooden spoon to combine until dry ingredients are just incorporated.
5. Use a rubber spatula to gently incorporate chopped chocolate bits into the dough.
6. Chill dough for 24-36 hours.
7. When you’re ready to bake, preheat the oven to 300 degrees F and line baking sheets with parchment paper.
8. Using a teaspoon and your hands, form large rounded lumps of dough (~2 TBS each – it should feel like a small handful when rolling, about the size of a ping pong ball) and place them on your cookie sheets ~3 inches apart. Make sure to give them the proper space.
9. Bake for about 20 minutes or until cookies are starting to lightly brown at the edges. If you want your cookies soft and chewy, do not let the cookies themselves turn golden on top. Simply remove after ~23 minutes (checking periodically) and leave them on the sheet for a few minutes to let them continue cooking before removing them with a spatula and placing them on a wire rack to cool.
Wednesday, July 16, 2008
Blueberry Muffins
When I was little, I assumed that all of my mom’s baking genius was rooted in the spiral-bound recipe book she kept in one of the kitchen shelves. Even though she had numerous recipes around the house, it always seemed to me that whenever she was making one of my favorite treats, the book was out there on the table, making sure everything turned out just right.
It was with the routine expectation of a gloriously successful product, then, that I set out to make her famous Sturbridge Blueberry Muffins – direct from the spiral notebook. I had copied the recipe by hand into a spiral notebook of my own when I got my first apartment. When I finally got to try one, I was beside myself with excitement. But alas! They were exactly like my mom’s…minus the flavor.
I called her up with the humility that only comes from a failed baking experiment, and whined that I must have followed the recipe incorrectly. There was a short pause on the receiver, then, “Hm… you know… I might have made a few changes to that recipe.” Wait wait wait CHANGES?! From the all-knowing BOOK?! As it turns out, my mom’s genius was not rooted in the book at all, but in – her genius. She made what a friend from my old office once termed “Mamafications.” There are some types of moms who deliberately alter recipes before distributing them to retain their family secrets, but mine isn’t one of them. When it comes to baking, she’s one of those intuitive individuals who just makes whatever changes she thinks are appropriate at that time. And they nearly always turn out fantastic. Phooey.
Okay so I haven’t inherited the talent for Mamafications, but I made a few changes of my own, and several mediocre batches later, here they are. They don’t photograph well, but they do make for a great breakfast. I am incredibly inept at making streusels, so instead I combine the topping ingredients into a bit of a paste and apply a little to each heap of batter prior to baking. This results in a sweet crust and a nicely shaped top over a moist, tender blueberry muffin.
Sturbridge Blueberry Muffins
(with norafications)
1 cup sugar
½ cup brown sugar
2 TBS baking powder
4 eggs
1 TBS salt
1 cup shortening
3 cups blueberries (whole)
1 cup milk
4 ½ cups flour
Topping Ingredients:
1/2 cup brown sugar
1/2 cup butter, cut into cubes
1/4 cup flour
1/8 tsp. cinnamon
1/8 tsp. nutmeg
Yield: 24 muffins
1. Put paper muffin liners in each cup of a 12-cup muffin tin (or paper two tins if you have two). Preheat the oven to 400 degrees.
2. Combine sugars and shortening in a large bowl with a wooden spoon.
3. Add the eggs and mix heartily with a wooden spoon until well blended. Add milk and stir until combined.
4. In a medium bowl, sift dry ingredients using a fork or a whisk. Add the dry ingredients to the wet ingredients with minimal stirring. Mix until just combined.
5. Fold the berries into the batter using a rubber spatula.
6. Use two spoons to distribute half the batter evenly between the 12 muffin cups.
---
Topping Directions:
1. Sift flour, cinnamon, and nutmeg.
2. Combine butter and brown sugar with a fork.
3. Add dry ingredients to creamed butter/sugar mixture; combinue using fingers, and lightly pile paste evenly onto muffin batter (once divided between the cups in the tin) prior to baking.
---
7. Pop the tin into the oven and bake the muffins for 15 to 20 minutes, or until a toothpick inserted into the center comes out clean. Let the muffins cool in the pan for 5 minutes before removing them and setting them on wire racks to complete cooling.
8. Make sure to let the muffin tin cool before washing it out and putting the second set of cups in and filling them with the rest of the batter. Repeat the baking process.
Friday, July 11, 2008
Ici: Ice cream review (lament)
My sister always used to tell my mom that she was impressed by my confident air that (presumably) implied I knew so much about life. Until the day she realized that I say everything with confidence -- even when I have no idea what I'm talking about.
Yes, it's true, I am a prime offender when it comes to speaking with conviction while lacking the necessary expertise to do such. Call it a quirk, call it a flaw, call it exceptionally annoying, whatever you like. In my quest for the best Berkeley ice cream, however, I've made the sad discovery that I am not the only one with this tendency.
The problem with living in a new city where you don't know anyone is that the only people whose opinions are available about food destinations are those on the unfiltered internet. This is not to say that I think of sites like Yelp and Chowhound as electronic hangouts for the Great Unwashed. What I mean is that you need people you trust to lead you to the best place for you. My boyfriend understands this better than anyone, in that every time I rave about a restaurant, his first question is, "Yes, but would I like it?" It takes an individual who knows you quite well to be able to answer that question, and unfortunately for me, none of those individuals are members of the online review boards.
This is all a big build-up for me to say that my experience at Ici, an outrageously popular ice cream establishment on College Avenue in Berkeley, was underwhelming. Yes, the owner was the former pastry chef at Chez Panisse. Yes, they boast exotic flavors like chickory-cinnamon, cardmom-rose, and lemon-thyme. And yes, my ice cream was tasty (one scoop of coffee ice cream in a cup -- it's cheating to get yours in a cone when reviewing a place, as ice cream nearly always tastes better in a cone).
BUT! My ice cream was not worlds better than any other ice cream place (except when compared to a place like ColdStone, my opinions on which could make me spontaneously combust). In fact, the first bite immediately made me wish I was eating the ice cream of Fosselman's instead. The texture was smooth and creamy, but I tasted more pure sweetness than coffee flavor, and I found myself thinking of it as the Nice Guy of ice cream. [As has often been said, girls tend to avoid dating the Nice Guy because he's all sweetness -- no edge, no complexity, no excitement.] Would I eat it if it was free? Certainly. Would I call it the best? Not by a long stretch.
The fact is, the simplest, most traditional flavors are the best ones by which to judge any ice cream joint because there's no novelty of the Gourmet Ice Cream Mad Libs that goes on nowadays. You know, [normal ice cream flavor] + [random trendy herb or spice] = [cutting edge]. Besides, if you find there's a combination that sounds great as a garnish for a steak (such as the "lemon-thyme" on the menu yesterday), isn't that a sign that it wouldn't make the best ice cream? So for now, I'm still on the lookout for a Berkeley standout.
Tuesday, June 17, 2008
Aunt Trish's Snickerdoodles
It’s a sad truth that sometimes, the more people become enamored with the now very fashionable world of food, it’s easy to become a bit of a snob. And while I admire all those who only buy organic ingredients, grow their own vegetables, and measure out their flour by weight instead of by cups, sometimes I yearn for the simplicity of a recipe whose primary purpose is to give you something sweet and comforting, even without the righteous frills.
It was with this in mind that I sought out a recipe for Snickerdoodles – the cookie that has, over the years, elicited perhaps the maximum scoffs from the entire population at large. I’ve had a few over time, but none were quite what I wanted. Several were delightfully oversized but disappointingly dry, while others looked chewy but felt about as soft as biting into a porcelain plate. Perhaps in my quest to utilize fancy ingredients and namedrop famous pastry chefs, I lost track of that important homey quality. Fate, it seems, kept me from the perfect snickerdoodle until I could find it again.
Luckily, I received a much-needed dose of reality to check my heady baking rampages when I took a stab at a lemon strawberry cake that was an incredible failure. I shant go into the details (as my poor bruised ego is still recovering), but needless to say the greatest fruits of my labor were a small burn on my left forearm and an entire loaf of bread that had to be thrown away. It was then that I was the fortunate recipient of a recipe from my boyfriend’s aunt. She tells me she’s not really a serious baker, but the Kitchen Aid on her counter, the antique bundt pans on the wall, and all my boyfriend’s accounts of her goods would suggest otherwise. This recipe yields the snickerdoodle of which I’ve always dreamed – crispy on the outside, chewy on the inside, with a simple but utterly delicious taste of butter, cinnamon, and sugar.
Unlike many snickerdoodle recipes that use only butter, this one uses both butter and shortening. Dorrie Greenspan says in her book that the combination of the fats is what makes her pie crusts the best around, and I am inclined to think that it is this same duo that makes the cookies what they are.
Aunt Trish's Snickerdoodles
Ingredients:
1/2 cup butter, softened
1/2 cup shortening
1 1/2 cup sugar
2 eggs
2 1/4 cups all-purpose flour
2 tsp. cream of tartar
1 tsp. baking soda
1/4 tsp. salt
2 TBS sugar
2 tsp. cinnamon
Method:
1. Preheat oven to 400 degrees F.
2. Mix butter, shortening, sugar, and eggs.
3. In a separate bowl, whisk together flour, cream of tartar, baking soda, and salt.
4. Add dry ingredients to wet ingredients and combine with wooden spoon. Shape dough by rounded teaspoons into balls.
5. In a shallow bowl, mix 2 TBS sugar and cinnamon; roll balls in mixture.
6. Place 2 inches apart on ungreased baking sheet.
7. Bake ~ 8 to 10 minutes or until set. Immediately remove from baking sheet.
Yield: ~ 6 dozen cookies.
Saturday, June 14, 2008
Cafe Fanny
Whenever I move to a new city, I like to familiarize myself with the places that are truly instrumental to my health and happiness – local bakeries. I don’t care what anyone says, Bakery Tours are the best way to acquaint oneself with a town. How could anyone doubt the benefits of a little exploration and a lot of baked goods? Since I moved to the bay area, I’ve been slacking on the bakery tour because I already knew of one bakery whose pastries I’d come to worship over the years. This entry is not about that bakery. Instead, I found today’s destination as an assignment from my dad, whose food research rivals those who actually get paid to do it. So, I took myself to Café Fanny. It’s not so much of a bakery as an eatery, or some synonymous word for “cute little place that serves somewhat pretentious but very tasty food.” For more on the establishment and its history, check out their website here.
Not to keep you in suspense, I’ll give the brief version right now: great breakfast place for a very European-feeling poached egg on toast and a latte that’s served in a bowl instead of (gasp) a mug with any sort of handle. Would I recommend it to people? Certainly, though it seems best for an individual or group of two, rather than a family or party of friends. Would I go again? I’ve almost undoubtedly found a new place for my weekend café rotation. Are the baked goods exquisite? To be honest, those showcased in the café seemed under-emphasized, but that’s because the café is situated directly next door to Acme Bread, which provides both sweet and savory delights that will send any bread appreciator (there should be a term for it – a “panthusiast”?) into raptures.
People around the bay area are very into their food, and I shant deny that there is a certain level of snobbery in all of Berkeley when it comes to eating. But that being said, Café Fanny is surprisingly accessible – at least, until the crowds show up (for me that was about 10:30 on a Saturday morning). Don’t bother asking for a nonfat latte, though, because they only have lowfat milk. So if you’re jonesing for a highly customized but high-quality cup of coffee, any nearby Peet’s Coffee is still your best bet. From a practical perspective, it’s best to arrive on the early side if you’re going for breakfast and don’t feel like standing in line. Standing at the counter to enjoy your steel-cut oatmeal or your buckwheat crepe with fruit and organic yogurt is definitely the preferred option. I ordered poached eggs on toast which, as you can see, were perfectly formed (and as you can’t see, were perfectly cooked – hooray). If you’ve ordered coffee, it will arrive at the counter almost certainly long before your food, so you have something to sip as you wait. My latte was soothing and not at all bitter, but also not extraordinarily hot. Keep in mind, I’m biased, and would rather scald myself on a drink that have it lukewarm. But its heat level was fine when I started drinking it – the large surface area of the bowl was certainly the cause of the heat dissipation over time.
The poached eggs arrived on beautiful buttered toast with a bit of salt and pepper sprinkled on top. The bread is a marvel in itself, certainly. And Café Fanny’s eggs were just what I wanted, though I am anxious to try the oatmeal next time. All in all, I greatly enjoyed the eating experience, topped off by a small “rye raisin rabbit” (a rye bun with raisins in it) from the Acme Bread bakery next door. Altogether, my latte and poached eggs ($6.25 by themselves) totaled up to $10.88, which I found reasonable, but I’ll probably just get food next time and enjoy a coffee afterwards.
Wednesday, April 30, 2008
Maple Lime Pecan Cookies
With all the chaos from moving back to the west coast, my blogging has obviously been severely neglected. It also seems that since I’m living in someone else’s house for 6 weeks or so, I shant be baking for a while. This is where I cry myself to sleep every night. In truth, I probably won’t have time for it anyway, given the whole new job thing and it’s associated time-consuming activities – like having to think before putting clothes on in the morning. Drag!
In light of this, I’ll spend today’s entry talking about the things I made last week. [Oh and of course, I forgot to take photos of this next cookie, so I’ll throw in pictures of the banana bread for the sake of looks.] Let us take, for instance, another Experiment In Terror – Maple Lime Pecan Cookies. When I told my little sister about my ambition to replicate the flavor of the sample I tried at the new neighborhood Whole Foods’ Nut Counter, she replied, “That sounds … not delicious.” And I suppose if I hadn’t tried the sample myself, I would’ve said the same thing.
Fortunately, I ignored her protests and ventured onward. And behold! I ended up with a delicious butter cookie flavored distinctly with pecans and maple candy bits in the dough and a – forgive my use of this word – zingy lime glaze on top. Without the glaze, the product was just another butter pecan cookie. With it, however, the cookie danced delicately on the line that separates “wow I never would’ve thought of this combination, but it’s really tasty” and “wow I would never have put these flavors together – with good reason.” Luckily for me, it ended on the latter side. So thank you, Whole Foods, intimidating grocery store extraordinaire, for a free sample of some inspiration. This is only further proof that free samples, not gravity, make the world go ’round.
Notes:
- The ingredient list is split into two parts, one for the cookie itself, one for the glaze.
- This recipe requires chilling the dough! Plan on baking them the next day or at least 3 hours after letting them reside in the fridge.
Maple Lime Pecan Cookies
Adapted from Alice Medrich’s Butter Cookie recipe in her book, Cookies And Brownies
Cookie Ingredients:
16 tablespoons unsalted butter, softened
3/4 cup sugar (I used extrafine)
1/4 tsp salt
1 1/2 tsp vanilla extract
2 cups all-purpose flour (I used unbleached)
zest of 2.5 limes
juice of 1 whole lime
1/3 cup crushed maple candy, chopped into small bits*
~3/4 cup whole pecans (measured while whole), chopped into small bits
*This can be found at Whole Foods, in the baking aisle. I encourage you to experiment with other ways to get the maple flavor into the cookie – let me know if you have any ideas!
Glaze Ingredients:
juice of 2 limes
~2 tsp sugar
1. Cream butter until smooth using wooden spoon
2. Using fingers, rub the lime zest into the sugar in a small bowl, making sure to bring out the juices in the zest
3. Cream butter, sugar, salt, zest, and vanilla until smooth and creamy but not fluffy, using a wooden spoon.
4. Add [1 lime’s worth of] lime juice and stir until completely incorporated.
5. In a separate bowl, sift flour using a wire whisk. Add maple bits and pecan pieces, and sift further using the whisk.
6. In 3 parts, slowly combine the dry ingredients into the wet ingredients, until just incorporated. This may take a bit of effort (it did for me!).
7. Knead the dough a couple times to make sure it's smooth.
8. Divide the dough in half and shape each half into a round log, 2 inches in diameter. Wrap each separately in plastic wrap. Chill for at least 3 hours.
-- When you’re soon going to be ready to bake --
9. Preheat oven to 350 degrees. Bake 12 to 14 minutes, or until light golden brown at the edges, rotating the cookie sheets from top to bottom and front to back halfway through the baking time to ensure even baking. (I skipped that step and had no problems)
-- While the cookies are in the oven --
i. Heat the lime juice and sugar in a small saucepan over low-medium heat.
ii. Stir the sugar into the lime juice using a rubber spatula, and cook until the sugar is completely dissolved.
iii. Set aside a small pastry brush.
10. Once you’ve removed the cookies from the oven, let them firm up on the pan for about 1 minute before transferring them to a rack. As they’re cooling, use the pastry brush to apply the glaze liberally to the top of each cookie.
11. Completely cool before stacking or storing. May be stored airtight for several days, but they’re best 3-4 days after baking.
Tuesday, April 15, 2008
Baking blog backlog
I seem to have developed a backlog of items I baked but have yet to write about. First, I tackled some coconut cupcakes (whose recipe is not mine to give, but I am including pictures anyway). Second, I finally took a stab at Pierre Hermé’s Korova Cookies, a sort of a French chocolate shortbread. Dorrie Greenspan calls them World Peace Cookies in her book, Baking: From My Home to Yours, but since it confuses me to have names that don’t describe the baked good itself, we’ll call them Chocolate Sablés. Third, because I was supposed to be at home all day yesterday packing my things to ready for this weekend’s move … I baked Nutella Cupcakes.
Because I did not create this recipe, I feel absolutely no shame in saying that the Chocolate Sablés are perhaps the most delicious chocolate cookie you will ever eat. They have an intense chocolate flavor due to the cocoa powder, augmented by the use of chopped bittersweet chocolate. Dorrie Greenspan notes in her book that the cookies are “salty,” but it’s hard to think of them that way when you’re eating them. They’re just a perfect chocolate cookie with the added complexity of the grainy, surprising, but entirely complimentary salt.
Note: I used fine sea salt because I lacked the mysterious fleur de sel, and I can’t even think of how they could improve using the original ingredient. Dorrie indicates in her book that this is a fine substitution – just reduce the salt to ¼ tsp rather than ½ tsp fleur de sel.
You can find the recipe (along with beautiful photos) here. Just remember when you're slicing the chilled dough that it will probably fall apart (it's supposed to do that) and that all you have to do is, for lack of a better word, squish the broken bits back together and all will be well once they've baked.
Lastly, I stumbled upon this “self-frosting” nutella cupcake recipe a few days ago and have been preoccupied with it ever since. I made a few slight changes to the recipe, as I thought it could do with the addition of instant espresso powder and an increase in vanilla. After all, any recipe with less than 1 tsp of vanilla extract makes me nervous.
The end product was not quite what I expected, mainly because the Nutella doesn't really seem very frosting-like at all (so the original "Self-Frosting" description misled me!). I liked them, but my only qualm was that the top half of the cupcake was much tastier than the bottom half – as the bottom half lacked nutella – and as a result, the experience was much more muffin-like than intended. However, the cupcake still tasted great, particularly when enjoyed with coffee.
Nutella Cupcakes Adapted from Baking Bites
10 tbsp (140 grams) butter, softened
3/4 cup white sugar
3 eggs
1 tsp vanilla
1 3/4 cups (200 grams) sifted all-purpose flour
1/4 tsp salt
1 ½ tsp instant espresso powder
2 tsp baking powder
Nutella, approx. 1/3 cup
Directions:
1. Preheat oven to 325F. Line 12 muffin tins with paper liners.
2. Cream together butter and sugar until light, using a wooden spoon or a hand mixer. If using an electric mixer, beat for ~ 2 minutes.
3. Add in eggs one at a time, mixing after each until fully incorporated. Don’t worry if the batter doesn’t look smooth.
4. Add vanilla and mix until incorporated.
5. In a separate bowl, whisk together flour, baking powder, espresso powder, and salt.
6. Stir dry mixture into the wet mixture using a wooden spoon until batter is uniform and no flour remains.
7. Distribute the batter evenly between the 12 cups using two spoons.
[Note: the Baking Bites version of this recipe says each liner should be ¾ full, but I could only fill mine slightly more than ½.]
8. Top each cake with 1 ½ tsp Nutella. Swirl Nutella in with a toothpick, making sure to fold a bit of batter up over the Nutella.
9. Bake for 20 minutes.
10. Remove and place on a wire rack to cool completely.
-- Makes 12 cupcakes --
Wednesday, April 9, 2008
Lemon Curd Cake
My family thrives on having certain core rules to guide our daily lives, both for big decisions and little ones. When I went with my mom to the grocery store, she told me to remember her three key attributes for an acceptable olive oil: Extra Virgin, First Cold Pressing, from Italy. When I got old enough to begin buying more fashionable clothes, my dad taught me about the Godzilla Rule: Make sure all your shoes are comfortable enough to run in, just in case Godzilla comes to town and you find yourself being chased by a giant fire-breathing lizard. (Note: Most women I meet do not follow the Godzilla rule -- man, will THEY be sorry when he shows up!)
Perhaps the most simple and yet frequently repeated rule was my dad's project mantra: Always make a mock-up. I can't think of one school assignment where I wasn't forced to draw up a draft or create a model of whatever it was I was planning to make. I was never very good with the mock-ups. After all, why devote time and energy to something that won't end up as your final product? But it turns out, the time you devote to thinking through your mock-up serves to make your final product better. Perhaps this would've given me clarity when I made my 5th grade state "float" (a Southern California tradition where kids decorate shoe boxes with tissue paper to mimic those of the annual Pasadena Rose Parade) and chose a large maple leaf made out of maple sugar as the centerpiece -- maybe then my float wouldn't have melted under the hot California sun.
It was with that singularly pathetic memory in mind that I decided to make a "test cake" in preparation for the one I was making for my sister's birthday. I used a lemon recipe from Cupcake Bakeshop and decided to add even more lemon and throw in some store-bought curd. You can find instructions for making your own lemon curd here, but I couldn't make the time to do that. You'll also notice that I divided the instructions into sections according to the overall function they play in the recipe. I hate long instructional blocks of text.
The result: A smooth, lemony cake that resembles a pound cake. Not for the faint-of-lemon-hearted. The lemon curd adds an extra touch of moisture and tang and pure lemon flavor that contrasts the cake nicely. I additionally made a glaze from lemon juice and sugar and painted the cooling cake with it so it could sit overnight and soak in. When served with fresh sliced strawberries on top, this made for a nice summery dessert.
Lemon Curd Cake
Adapted from Cupcake Bakeshop
Makes 1 8"-round cake
For the cake:
8 tablespoons (1 stick) unsalted butter, room temperature
1 cup sugar
3 large eggs
1½ cups all-purpose flour
1 teaspoon baking powder
½ teaspoon salt
1 teaspoon pure vanilla extract
½ cup milk
3 tablespoons fresh lemon juice
zest of one lemon
For the glaze:
1/3 cup lemon juice
3 TBS sugar
- Center a rack in the oven and preheat the oven to 350 degrees F -
- Butter and flour 1 8-inch round cake pan. Set aside.
Assembling the batter
1. Using a standing mixer or a hand mixer, cream butter and sugar in a large bowl, until fluffy. [A wooden spoon may work here, but I get the feeling the electric mixer is key in aerating the cake. Though I might be wrong.]
2. Add eggs one at a time, beating each until fully incorporated.
3. In a medium bowl, use a whisk or a fork to combine flour, baking powder, and salt.
4. In a large measuring cup or small bowl, combine milk and vanilla (you may stir with a spoon if you like, but no implement is really required here)
5. Alternately add dry ingredients and wet ingredients to the butter/sugar/egg mixture, beginning and ending with the dry ingredients. Mix in with wooden spoon until just combined.
6. Mix in lemon juice and lemon zest (a wooden spoon works fine for this step as well).
7. Using a rubber spatula, transfer the batter from the bowl to the cake pan.
Baking the cake
8. Bake for ~30 minutes initially and check on your cake. It probably will still be liquid-like in the cake's top-middle region. Continue to bake for 3-5 minutes at a time, depending on how your cake smells, for a total of approximately 40-45 minutes (or perhaps even longer if necessary). If your kitchen begins to smell buttery and lemony, your cake is probably pretty close to done. If there's no cake smell, chances are it's probably still batter and not yet cake.
9. Once your cake has been in the oven for ~30 minutes, it's time to make the glaze.
a. Combine the lemon juice and sugar over medium-low heat in a small saucepan
b. Stir the sugar into the lemon juice and continue to cook until the sugar is entirely dissolved into the lemon juice. Make sure the lemon juice boils gently, so as not to burn the sugar before it's entirely mixed in.
10. Remove cake from oven when a thin knife inserted into the middle of the cake comes out clean. Make sure to insert the knife deep enough -- you don't want to remove the cake if it's still raw in the middle. Your cake will be domed instead of flat on top -- this is what you want.
Applying the glaze
11. Let the cake cool in the pan for ~3-5 minutes on a cooling rack. Then, use a clean kitchen towel to help you remove the cake from the pan. You can do this by holding the cake pan (with an oven mitt) in one hand and the towel in the other. Place the towel on top of the cake and place your empty hand on it. Carefully flip your hands over so that the hand with the towel now is also supporting the weight of the cake from the pan. Toss the pan aside and use the rest of the towel and your now free hand to flip the cake back right-side-up and onto the cooling rack.
12. Using a pastry brush, apply the lemon glaze to the top, sides, and bottom of the cake. Let cool until room temperature.
13. Wrap cake tightly in plastic wrap and keep at room temperature overnight, or for a few hours to let the glaze sink in.
Assembling the cake
14. Unwrap the cake and use a serrated knife to make 3 radial cuts in the cake, producing 4 thin layers.
15. Carefully separate the layers and use a butter knife to apply a generous layer of lemon curd to each layer. Reassemble the cake as best you can. Serve with fresh strawberries if you like.
Thursday, April 3, 2008
Scones! Wait, Scones?!
I tend to characterize baked goods not only by the way they taste, but how I feel they express their personalities. I suppose it's stereotypical of me, but I tend to divide them in my mind first by category, and then by individual variety. For example, cookies are down-to-earth, good with children, and accepting of all -- milk, tea, hot chocolate, and coffee. Layered cakes are much fancier and self-absorbed, only showing up on special occasions when they surface like wealthy hermits at annual social events only to disappear back into obscurity afterwards (though the exception to this rule is Yellow Cake with Chocolate Frosting, who always makes others feel welcome). Store-bought bread has an inferiority complex, cupcakes think very highly of themselves, and muffins are stealth desserts disguised as breakfast.
When you're younger, you can see these distinctions pretty clearly. There's a whole set of "grown-up" baked goods that display much pricklier dispositions. Biscotti hurts to bite into and makes you thirsty (seemingly on purpose -- jerk). Restaurant breads are often filled with seeds that make you feel much more like Big Bird than you would've ever wanted. Croissants feel light when you eat them, but then people tell you that eating them will make you fat. And then there's the scone.
The scone is perhaps the greatest deceiver of them all. It's not very sweet, not very soft, not very moist, and yet resembles an enormous craggly cookie that has "I promise I'm fun-tasting" written all over it. Many are filled with what look like mini chocolate chips, but alas! They're actually the estranged cousins of raisins known as Currants. And when you have a mouth full of them when you thought you were about to experience a world of chocolatey goodness, instead you feel as though someone just sunk your Battleship.
Of course, when you get older, you find that currants are actually pretty tasty, seeded breads go well with meals, and biscotti can only be fully enjoyed with a cup of hot coffee. And yet, I often find that even with my more food-enlightened older self, many scones are still as dry and deceiving as I remember them to be. But not these.
These are adapted from the Cheese Board book, and they are some of the best scones I've ever had. Flavorful, moist, and rich but not uncomfortably heavy, these can be paired with coffee like traditional scones, but I enjoy them plain. The only reason I resorted to scones in the first place is because I had both buttermilk and heavy cream leftover from an earlier project -- and I hate that they spoil so quickly. After trying these, I plan to have a lot of "leftover" buttermilk and heavy cream around from hereon out. Oh and in regards to the source of this recipe, it is my hope you will try this one and immediately go out and purchase a copy of the book, as there are numerous other amazing recipes to try.
Notes:
- Make sure to use unbleached flour -- I didn't have any at the time, and I'm convinced it was this substitution that made them much harder to assemble when placing them on the baking sheet.
- I increased the amount of chocolate chips called for in the recipe, which improved them significantly in my mind. The dough-to-chip recipe is key.
- If you're feeling adventurous, I might add 1/4-1/2 tsp of cinnamon, though the plain buttery taste is great on its own.
- You may want to check on and rotate your scones (remove the pan briefly and turn it around) after about 15 minutes of baking. I know my oven doesn't bake as evenly as I'd like, so it makes it harder to get them to an equal degree of done-ness.
- The second time I made these, I made less of an effort to get all the flour into the scones -- having some left in the bowl actually seemed to benefit the final product.
The Cheese Board's Chocolate Chip Scones
3 1/2 cups unbleached all-purpose flour
1/2 teaspoon baking soda
1 tablespoon baking powder
1/2 teaspoon kosher salt
3/4 cup sugar
1 cup (2 sticks) cold unsalted butter, cut into 1-inch cubes
1 1/2 cup chocolate chips
3/4 cup heavy cream
3/4 cup buttermilk -- SHAKE WELL prior to using
Directions:
Preheat the oven to 375 degrees F and line 2 baking sheets with parchment paper. Set aside.
1. Combine flour, baking soda, and baking powder in a large bowl using a wire whisk.
2. Using a wooden spoon, stir salt and sugar into the dry ingredient mixture.
3. Cut the butter into the flour mixture using sharp knives or a pastry cutter, until the size of small peas (they need not be entirely uniform). 4. Use your wooden spoon to mix in the chocolate chips.
5. Using a cup or a spoon, form a large well in the middle of the mixture. Add the buttermilk and heavy cream to the well.
6. Mix until just combined (there will be some flour left at the bottom of the bowl).
7. Use a spoon and your hands to form rough balls of dough, approximately 2.25 inches in diameter (I just judged them to be a large handful) and place on the parchment papered baking sheets, a few inches apart. Do not smooth the surfaces of the scones -- they should be somewhat lumpy.
8. Sprinkle sugar as desired over each scone -- make sure not to get too much sugar on the pan, as it will caramelize and eventually burn if not on a scone.
9. Bake at 375 degrees for 25-30 minutes, or until the scones are golden brown. Remove from the baking sheets with a spatula and let them cool on wire racks.
Yield: ~ 10 - 12 scones
Subscribe to:
Posts (Atom)