 Sometimes I feel that the world of baking has gotten out of control. In search of something new and exciting, increasingly more magazines, cookbooks, and yes, even blogs, have been showcasing excessively "decadent" (read: overdone) dessert recipes. I love a bit of indulgence just as much as the next person, but when I'm beseiged by a horde of Triple Chocolate Caramel Fudge monstrosities, my taste buds shrink in fear.There's an entire new genre of such baked goods, whose descriptions seem the baking equivalent to letting 4-year-olds pick their own names. Only instead of a world of Princess Rainbow Unicorns and Optimus Michaelangelo Squarepants (forgive the gendered examples), you're left with Banana Berry Brownie Pizza and Coconut Marshmallow Cream Meringue Pie.So when I glanced at the many varied ingredients for these cookies, I was instantly suspicious. Peanut butter, espresso powder, chocolate, oats, AND hazelnuts? But I was surprised to find that it all came together very nicely in a large, chewy cookie with the air of a regular chocolate chip cookie who just returned after hitchhiking through Western Europe -- simultaneously more worldly (the espresso powder and hazelnuts) and more down-to-earth (the peanut butter and whole wheat flour). I can't quite explain it, but if you're looking for a tasty cookie that doesn't blast your brains out with sweetness, give this a try.Hazelnut Mocha CookiesAdapted from Better Homes & Gardens' Christmas Cookies Magazine, 2008Ingredients:1 TBS instant espresso powder1 TBS water1 1/2 cups smooth peanut butter1/2 cup butter, softened1 1/2 cups brown sugar, packed1 1/2 tsp baking soda1/4 tsp salt2 eggs1 1/8 tsp vanilla1 1/2 cups regular rolled oats (I use old-fashioned)1/2 cup whole wheat flour1 cup dark chocolate pieces (I use ~5 oz chopped bittersweet chocolate)1 cup hazelnuts, toasted and choppedTo toast hazelnuts:1. Preheat oven to 350 degrees, F. Spread nuts in a single layer in a shallow baking pan (or on a baking sheet lined with foil).2. Bake nuts for ~10 minutes (or ~14, if the nuts were stored in the freezer), stirring once.3. Place the warm nuts on a clean kitchen towel. Rub the nuts with the towel to remove the loose skins. Let cool and chop. Set aside.
To assemble and bake cookies:
1. Preheat the oven to 350 degrees, F. In a small bowl, stir together espresso powder and the water until powder dissolves; set aside.2. In a large bowl, combine butter and peanut butter with a wooden spoon until well mixed. Add brown sugar, baking soda, and salt. Beat until combined. Beat in eggs, vanilla, and espresso mixture until combined. Beat in oats. Beat in flour. Stir in chocolate pieces and hazelnuts.3. Drop dough from a 1/4 cup measure (I roll it into balls), 3 inches apart onto an ungreased cookie sheet (line them with parchment paper for ease of clean-up); press each ball slightly.4. Bake for 13 to 15 minutes, or until edges are lightly browned. Be careful not to overbake. Cool on cookie sheet for ~2 minutes. Transfer cookies to a wire rack; let cool.Yield: ~24 mondo-large cookies.To store: Layer cookies between sheets of wax paper in an airtight container; cover. Store at room temperature or freeze for up to 3 months (and when you're ready to serve them, let them thaw on the counter for a few hours until they come to room temperature).
 Christmastime is a season of giving, of loving, and appreciating. But most of all, it is a season of baking cookies until you reach the point of collapse. Or at least, that's how it's always been at my house. Every year, the kitchen would transform into a cookie factory in the days leading up to the holiday. And while the baked sweets were of course delicious and exceptionally pretty, they were also a mechanism of extraordinary power. For everyone knows that the better your cookies are, the more Santa will recognize how good you've been.
No one was more cognizant of this power than she who wielded it, the great Baker of Cookies and High Priestess of the Altar of the Claus. Or as we like to call her, Mom. One of my earliest Christmas memories was of being in kindergarten, executing a homework assignment to write a letter to Santa. These letters would presumably be sent to the North Pole upon completion, though how my teacher had an in with the big guy I never quite understood. So there I was, sitting at the table, writing on the scratchy-as-pure-wood-shavings recycled paper they give to 5 year-olds, and wondering what I wanted. I decided I wanted a pet snake (don't ask). I believe I was reading it to my mom as I was writing, indicating that for Christmas I would please like "a snake and snake food." After the slightly dismaying revelation that "snake food" consists of live rodentia, I was a little disgusted, but undeterred. Until Mom uttered the fatal words: "If Santa brings you a pet snake, I'm never baking him another cookie again." And suddenly -- poof! -- desire for a snake, gone!I don't remember what it was I asked for instead, but I remember feeling no remorse, knowing that it was much better to pick one of the many other things that would make me happy than to jeopardize my standing up at the Pole. And now that I'm old enough to bake my own cookies (and old enough to know that a pet snake is a terrible idea for a kid as flighty as I was), I like to think of the delicate sugared butter cookies I make each year as both a bringer of joy and a bringer of peace. Joy to the kids I may someday have, who will hopefully (thanks to the cookies, of course) get what they want... and peace to me, should I ever need to wield my power if they ask for something similarly absurd/dangerous.Cookie Summary:
 A butter cookie topped with crystal sugar, this recipe is simple and delicious. There are no leavening agents added, and although the dough calls for egg yolk only, the decoration makes use of the egg white so nothing goes to waste. They are labor-intensive, in that the dough needs to chill and that it's a bit hard to work with when first removed from the fridge. But their taste makes them a standard in my family every year, and I don't mind the trouble when I get to pop a few into my mouth as a reward.Finska Pinnar
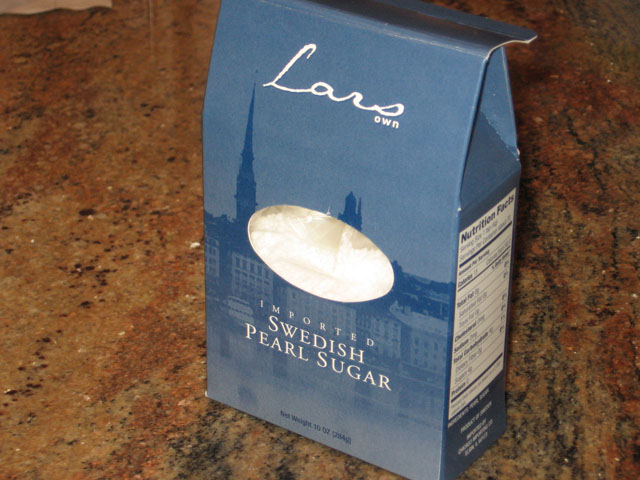
Adapted from a recipe in the Los Angeles Times, with MamaficationsYield: ~ 4 dozen small cookiesIngredients:1/2 lb. butter, softened (2 sticks)1/2 cup sugar1 egg, separated1/2 tsp. vanilla extract2 1/4 cups flourcoarse "pearl" sugar (I like this kind, which can be found at Ikea)crystal sugar of the colors of your choiceDirections:1. In a large bowl, beat butter with a wooden spoon or mixer until creamy.2. Beat in sugar and egg yolk (set egg white aside and refrigerate in a bowl, beneath plastic wrap). Add vanilla and mix in until combined.3. Gradually work flour into the mixture to form a dough (I do it in about 3 or 4 parts).4. Chill the dough for at least 2 hrs. Can be chilled up to 24 hours.When you're ready to roll the dough:Set out: baking sheets, parchment paper, wax paper for your work surface, pearl sugar, colored sugar, reserved egg white, a pastry brush, spoon, butter knife, and a bowl or shallow dish with sidesPreheat oven to 350 degrees F.5. Lay out wax paper on a work surface and line baking sheets with parchment paper. Use a regular teaspoon to carve out smaller pieces of the big chilled chunk of dough to make it easier to work with. Using a few bits at a time (a small handful), quickly soften the dough slightly by kneading it between your fingers and palms. Then roll dough into ropes about 1/2" in diameter (these can be long or short, but I find making longer ones speeds up the decorating process) on the wax paper. Do not flour your surface, or your cookies will become dry. Wax paper will prevent sticking.6. Set out the bowl or a shallow container with sides at least 1" high and mix a bit of the colored sugar with the pearl sugar. Use your discretion -- don't use all your colored and pearl sugar at once because they'll probably get dirtied with egg white.7. Using a butter knife, cut the dough ropes into lengths about 1" long (about the length of your thumb). Use a pastry brush dipped in the egg white and lightly brush the tops of each of the pieces.8. Before the egg white dries on the dough, dip each of the brushed pieces in the sugar mixture and place them on the lined baking sheet, with at least 1 " between them.9. Baking one sheet at a time, bake the cookies for 15 to 20 minutes, or until the ones on the edge of the pan are SLIGHTLY golden at the edges. IT IS VERY EASY TO BURN THESE, so if your oven tends to run hot, check them instead at 13 minutes first. A good rule of thumb is to judge the smell -- when your kitchen starts to smell like cookies, that's a sign you should start preparing your cooling racks.
 Sometimes I feel that the world of baking has gotten out of control. In search of something new and exciting, increasingly more magazines, cookbooks, and yes, even blogs, have been showcasing excessively "decadent" (read: overdone) dessert recipes. I love a bit of indulgence just as much as the next person, but when I'm beseiged by a horde of Triple Chocolate Caramel Fudge monstrosities, my taste buds shrink in fear.

