Friday, March 28, 2008

Strawberry cupcakes

I remember reading "Like Water For Chocolate" a few years ago, and being amused by the very literal ties between food and emotions. One particular chapter that stuck out in my mind. The female protagonist was heartbroken because she was deeply in love with a man who, due to complex circumstances, ended up marrying her sister instead. At the wedding, she baked the cake for the couple and cried into the batter as she was stirring it. When the guests ate it, they all ended up violently ill because they could taste her endless sorrow. Or at least, that's how I remember it.

In that case, one could describe last week's lemon cupcakes with strawberry frosting as filled with excitement, with a strong taste of wonder, and a tinge of nostalgia. (Or you could simply say they were lemony and refreshing with the lemon tint running in both the cake and the frosting.) It seems that this lowly Peter Parker is leaving the Daily Bugle for greener pastures. That's right -- I got a new day job.

I shant get into the details, because I'm sure there will be plenty once I get myself together and relocate to the west coast. For now, there are the baked goods.

Over the last several days, I made two batches of cupcakes -- one with my family, and one by myself. The ones shown in the adjoining photos are strawberry cupcakes with strawberry frosting. Unfortunately, I cannot include the recipe for the frosting because it was a concoction of my mom and sister's cooperative efforts. I do know that they used a combination of fresh strawberries, strawberry sauce (whose recipe I have temporarily lost), cream cheese, and lemon zest. When I get more information about it, I'll post it.

The strawberry cupcakes were nice and light-tasting, and surprisingly fruity (I've often found that many fruit-flavored cupcakes leave something to be desired in their resemblance to the star ingredient). The recipe can be found here. My notes are as follows:

- We used approximately 1 1/2 cups of chopped fresh strawberries instead of just 1. It didn't change the consistency of the batter too significantly, and the resulting cake was that much more flavorful for it.
- Our strawberries were extremely ripe, which was extremely convenient (though it meant that prep took longer, as we kept eating them). Many recipes will tell you to adjust the sugar according to the ripeness of the fruit, but most cupcake recipes have adequate sugar to prevent the cake from being sour, and I don't like to add too much extra sugar. So be light-handed with it.
- It is my personal belief that all fruit cakes taste better when paired with a citrus zest or taste of some sort. Keep that in mind when making your frosting choice!
- These cupcakes also tasted great when eaten plain, which is nice. They seem like a great spring/summer dessert, and are best when topped with a few slices of fresh strawberry (the tartness is key).

I also made another batch of cupcakes to use up the rest of the frosting. The resulting lemon cupcakes were satisfyingly citrus-y, and paired well with the milder strawberry flavor. The recipe is here. I don't have many notes on these because everything came out well!

Sunday, March 23, 2008

Carrot Muffins

My family’s food passions are fueled by fixation. We develop almost unhealthy fascinations with particular dishes on a frequent basis – much to my delight. Between my parents, my sister and me, it is not uncommon for one of us to refer to our current “mission,” such as crafting the perfect Jello masterpiece for the Easter table, or taming the caramelization of a tarte tatin. So this year, when I heard my family had become obsessed (or shall we say “preoccupied”) with carrot cake, I didn’t think too much of it. That’s just how we are.

Since I got a job and moved to the East Coast, far away from my family in California, it has been difficult to work out spending major holidays together. Thanksgiving was the last time the four of us were in the same place. This means that for the past several months, I have been baking endlessly, but my best critics were unable to give their professional opinions. So since they told me a few weeks ago that they were coming to visit for Easter, the words “carrot cake” have been running on an endless electronic billboard loop in my brain (akin to the ones that proclaim “DE-FENSE!” at football games).


My family has also been spending these last few months getting healthy. They are all diligent about exercising, making sure to eat right, and generally putting me to shame with their discipline. So riddle me this, Batman – how do you make carrot cake not … coronary bypass-worthy and yet still palatable?


The answer came in these Carrot Muffins, whose recipe I found at Allrecipes.com and modified to suit my needs. I shant detail those modifications here, because to do so may detract from the main point about this recipe; it produces wonderfully moist, flavorful muffin-cakes that taste completely full-bodied rather than artificially slimmed down. Just as I don’t believe in unnatural diets for people, I also don’t believe in unnatural diets for baked goods. At the end of the day, it’s a treat, to be enjoyed in moderation of course, but mainly to be enjoyed.


My family’s verdict: “Mission” accomplished.


Carrot Muffins
Recipe adapted from Allrecipes.com

A few notes:
- Do not be intimidated by the long ingredient list. Everything comes together very quickly and mostly easily – and obviously you can make many changes to the spices depending on your cupboard’s contents.

- The only part of the process that is at all difficult is the shredding of the carrots. Make sure you grate your carrots into very thin pieces so they won’t be too chunky when eating. This step takes a while. Set aside some time, or shred your carrots the night before if you like.


- When I tried these just out of the oven, I was inconsolably disappointed in how they turned out. The next morning, once they had cooled, they had catapulted themselves into a whole higher sphere of taste. Moral: Muffins are best once completely cooled.

Ingredients:
1 cup flour
1 cup whole wheat flour
2 tsps. baking soda

1 tsp. baking powder

¼ tsp. salt

2 tsps. cinnamon
¼ tsp. ginger
¼ tsp. cloves

¼ tsp. nutmeg

½ cup white sugar

½ cup brown sugar

¼ cup canola oil

¾ cup applesauce
3 eggs, beaten
1 tsp. vanilla
½ cup uncooked rolled oats
½ cup flaked coconut
½ cup golden raisins
1 ½ cups walnuts

2 cups shredded carrots

1 8-oz can crushed pineapple (stored in pineapple juice, NOT syrup), drained

Directions:
1. Preheat oven to 350 degrees F. Lightly grease muffin pans or use paper muffin liners (I use 2 per cup).

2. In a large bowl, whisk together the all-purpose flour, whole-wheat flour, baking soda, baking powder, salt, cinnamon, ginger, cloves, and nutmeg.
3. Make a well in the center of the dry mixture and add white sugar, brown sugar, applesauce, canola oil, eggs, and vanilla. Mix just until evenly moist.

4. Using a rubber spatula, fold in the oats, coconut, raisins, carrots, walnuts and pineapple.
5. Fill each muffin cup about 2/3 full and bake for ~25 minutes, or until a thin knife inserted in the center of a muffin comes out clean.

~A Note: Remember my resolution to be more daring? This is my entry to Sugar High Friday. Hooray!

Wednesday, March 19, 2008

Not Really Brioche and Baby Banana Cakes

For the first several months at my current job, my team used to have a weekly meeting where we’d all sit around and go through each of our projects. We’d have to give a status update on each (usually consisting of “so-and-so has been ignoring my e-mails so I showed up at her desk and she pretended not to recognize me”-type anecdotes) and then state our lessons learned. It became increasingly disappointing to find that nobody seemed to learn the primary lesson the ritual delivered, which was “This meeting is a colossal waste of my time and I’d rather eat my stapler than be forced to attend once more.”

It is with that spirit that I will attempt to briefly and honestly list my own baking lessons learned from the week so far.

- Never begin baking yeasted bread products when the price of wheat is at an all-time high
- Make sure to read the instructions on each dry active yeast package prior to purchasing because one packet may be more than enough to satisfy your recipe’s need (and you wouldn’t want to end up frantically purchasing 12x the needed amount in an instruction-phobic frenzy, now would you?)
- Before attempting any yeasted bread products, it is prudent to read up on helpful techniques beforehand, at a place like The Fresh Loaf.

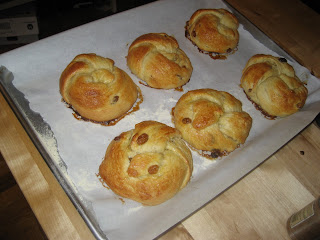
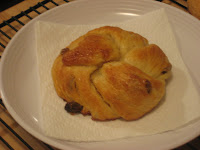
My two major ventures for the week were “brioche” knots, whose recipe can be found in The Cheese Board: Collective Works. The word “brioche” is in quotation marks because what I made by no means qualifies as the French pastry with the same name. I am opting not to copy the recipe here simply because it would seem rather cruel to those of the Berkeley collective to deprive them of income that will further fuel their bread-baking efforts – particularly since I so benefit from that bread-baking each time I’m in the area. I shall not include notes on this recipe because individuals with far more insight on the creation of yeasted bread products share their wisdom at The Fresh Loaf. So go there!

Luckily, the recipe for Baby Banana Cakes is freely available online at Seriouseats.com. Dorrie Greenspan, baking messiah, has a weekly column there that has become my new favorite web-jaunt. Here are my notes:


- The comments attached to the recipe suggested adding ½ tsp of cinnamon, so I made that addition, and threw in ¼ tsp nutmeg as well. The result was a very homey flavor that complimented rather than overshadowed the banana, which I found quite satisfying. I also added ¾ cup coarsely chopped walnuts, but did not toast them because I was lazy.
- I used 2 large bananas and ended up with closer to 1 cup mashed banana than ¾, but I did not observe any negative effects of the change. In fact, the next time I make them, I’ll probably use the same amount.
- The cakes were quite moist yet substantial, but neither soupy nor dense. I served the majority of mine the morning after baking. Sadly, they lost the pleasant crust being in an airtight container overnight. I suggest you eat them as soon as they’re cool enough to break open without burning your fingers.
- Warning: baking time was a major issue for me. I ended up pulling my cakes out of the oven after about 22 minutes of baking, and they were on the verge of becoming burnt. I’m not sure why things were so off on that front, as I always check the temperature of my oven prior to baking with my handy oven thermometer. Be sure to check the baking of these cakes by smell first, and instructions second.
- My cakes did not flatten like those in Dorrie’s picture, and were mistaken for muffins. Perhaps they wouldn’t go well with jam, but I suspect that cutting them in half and lightly toasting them in a toaster oven would suit them quite nicely.

Do I dare to eat a peach?

I was speaking with a friend yesterday about poker, and why I never learned to play. I explained that I hadn't invested the time and effort because I am averse to gambling -- and I'm averse to gambling because I am cheap. Why participate in ventures where I am likely to end up tossing my money away? To this, he replied that I was making a wise choice. After all, he said, if you don't risk anything, you don't lose anything.

And when he put it that way, it suddenly didn't sound nearly so wise.

I took our conversation not as a sign to learn poker, but as an impetus to become more active in areas where I would otherwise be happy to complacently drift. Let's take this blog, for instance. It is easy to present oneself to an audience of .... four. So, in the spirit of adventure, I hereby pledge to take the necessary steps to get this blog some actual readers (who aren't somehow obligated, by blood or friendship, to read). Here is my plan -- participate in various cross-blog events, such as Tuesdays with Dorrie. I believe Sugar High Friday shall be my first foray into the that world. Perhaps I should get pumped, Rocky-style, and go for a run around the mean streets of...Long Island. Perhaps not.

Saturday, March 15, 2008

Chewy Cocoa Fudge Cookies

When I woke up this morning, I felt it was time to take a crack at a new recipe. Today I choose this from Words To Eat By, a blog I discovered only yesterday. You can find the recipe here.

I wanted to refer to these as Chocolate Deathcakes (as in, Death by Chocolate, not that they taste like death), but I was vetoed on account of it being a rather unappetizing title. Oh well. These cookies are fudgy, a bit fragile, and have an extremely intensely chocolate taste. It’s the cookie equivalent of a truffle. The recipe’s author describes the ways in which you can change the character of the cookie by varying your add-ins, and I’m sure experimenting with that can yield a variety of delicious results. However, I liked mine as chocolate, and chocolate only. These also somewhat resemble Dorrie Greenspan's Bittersweet Brownies from her book, Baking: From My Home To Yours. Mmm.

Let it be noted that “chocoholic” is one of my least favorite words (and a made-up one, at that) of all time. “Chocoholic” implies that one will eat anything with “chocolate” in the name, and for an audience of such self-identified chocolate fanatics, this cookie may not be for them. Make these for the lover of chocolate who uses some degree of discrimination. For the true experience, do not use premade chocolate chips, and do not use semi-sweet chocolate. The cocoa taste is the star here – the melty chocolate bits throughout are simply icing on the cake.

Chewy Cocoa Fudge Cookies

Here are my notes:

- I used nonfat Greek yogurt to make the cookies richer, as opposed to using regular Dannon or some similar common brand. I’m sure they’d be fine with regular nonfat yogurt, though.
- If you want these to be truly fudgey cookies, do not use any nuts. Instead, use approximately 4 oz of bittersweet chocolate, chopped into bits.
- Dropping “level tablespoons” of dough on cookie sheets never seems to work for me, so I almost always roll them into rough balls by hand. My yield came out closer to 24 cookies than 28-30.
- I used parchment paper instead of cooking spray or silpats on my baking sheet, and it worked well.
- You will note from my photos that my cookies did not flatten out. One of the comments on the author’s blog suggests that this may be due to the kind of butter one uses. In all honesty, I liked having a little height to them.
- Cooking time was a major issue for me, probably due to the fact that my cookies did not flatten. If you find your cookies are rather on the tall side, be sure to add at least 5 minutes to their total baking time. I had to carefully monitor them, so make sure to give these your full attention.
- At least twice, I thought the cookies were done and let them set up on the baking sheet for a few minutes, only to find that they were still molten on the inside. This may sound terrible, but I tried one in this intermediate non-dough, non-cookie state, and it was pret-ty tasty. I figure there can’t be too much danger in that, as the dough contains no eggs. But I wouldn’t suggest leaving your entire batch that way.

Sunday, March 9, 2008

Coffee Cake Extravaganza

If last week’s coffee cake was an Experiment In Terror, this week’s was an Extreme Experiment In Terror. After spending hours last week paging through baking books, recipes, and food blogs, I made several adjustments to the recipe – mainly to the middle and top layers.

In an effort to eliminate the undesirable molten sugar feature in the middle of the cake (while simultaneously trying to preserve the “hey something nifty in the center” feature), I put two layers of streusel-type mixtures in this cake. The middle layer is a bit of a misnomer, as streusel generally contains flour and mine is only sugar, spice, and butter. I adapted it from a Dorrie Greenspan recipe for Cinnamon Chocolate Squares, where she uses sugar, cinnamon, and bits of chopped chocolate. No chocolate in this cake, though, as I wanted to preserve the breakfasty quality.

The top layer of streusel I adapted from another Dorrie Greenspan recipe, though I can’t remember which at the moment. Perhaps the Allspice Crumb Muffins in Baking: From My Home To Yours. It definitely did not turn out the way I expected because it still didn’t have any “crumble” to it at all. Instead, it formed a surprisingly welcome golden crust. Despite my expectations for a crumbly top, I have adopted the Elliot-to-E.T. stance on the crust, and adamantly declare, “I’m keeping him.”

My only small qualm about this version of the recipe is that there were a couple small warm melty sugar pockets near the top layer of the cake, just beneath the crust. However, I expect those could be eliminated by devoting a little more thought into how I apply the butter-nut-spice crumbs on the top. If such pockets would bother you, make sure not to put too many buttery clumps too close together prior to baking.

So here it is, my “final” version. I reserve the right to modify it in the future, but take note that I am writing this by hand into my beloved spiral notebook of recipes – and it doesn’t get more final than that.

Coffee Cake v 2.0

Ingredients:

For the cake:
1 cup sugar
½ cup butter, room temperature
2 large eggs
1 teaspoon vanilla
1 teaspoon almond extract
2 cups flour
1 teaspoon baking powder
1 teaspoon baking soda
½ teaspoon salt
½ teaspoon allspice
1 cup sour cream (reduced-fat is fine)

For the middle “streusel” (even though it contains no flour):
1 ½ TBS sugar
2 tsps cinnamon
1 pinch (~ 1/8 tsp.) ground nutmeg
3 TBS cold, unsalted butter, cut into bits

For the top crust:
5 TBS unsalted butter, room temp
¼ cup sugar
¼ cup packed brown sugar
1/3 cup all purpose flour
1 pinch (~1/8 tsp.) salt
½ cup sliced almonds, chopped further into very small pieces

Note: I have put separate sets of directions for the middle layer, the cake, and the crust. It would be advisable to perform each set of directions in the order I lay out here. I am also re-listing the ingredients that correspond with each group of directions, for the sake of clarity.

Directions:

For the middle layer:

1 ½ TBS sugar
2 tsps cinnamon
1 pinch (~ 1/8 tsp.) ground nutmeg
3 TBS cold, unsalted butter, cut into bits

1. Combine the sugar, cinnamon, and nutmeg in a small bowl using your fingers.
2. Add the cold bits of butter to the spice mixture and thoroughly coat each piece with the sugar and spice. Set aside in the refrigerator.

For the cake:

1 cup sugar
½ cup butter, room temperature
2 large eggs
1 teaspoon vanilla
1 teaspoon almond extract
2 cups flour
1 teaspoon baking powder
1 teaspoon baking soda
½ teaspoon salt
½ teaspoon allspice
1 cup sour cream

1. Butter an 8 x 8 x 3-inch baking pan and preheat your oven to 350 degrees F.
2. Cream butter and sugar in a large bowl.
3. Add eggs and extracts; beat well.
4. In a separate bowl, whisk dry ingredients (flour, baking powder, baking soda, salt, allspice) to combine.
5. Mix ½ of the dry ingredients into the butter mixture.
6. Mix sour cream into the butter/dry ingredient mixture.
7. Mix remaining dry ingredients into the larger bowl.
8. Using a rubber spatula, scrape approximately half of the dough (or slightly more than that, if you need more to cover the bottom of the pan) into the buttered pan. Use a butter knife to spread the dough evenly along the bottom in a thin layer.
9. Remove your middle layer ingredient bowl from the refrigerator and sprinkle the spice-coated butter pieces evenly on the dough – there will be plenty of white spots, as there is not enough butter to cover the entire surface area.
10. Sprinkle the remaining sugar-spice mixture evenly over the dough.
11. Add the second half of the dough to the pan, using a butter knife to spread it evenly. Be careful not to move too much of the spiced butter around beneath it, or you will unbalance your proportions.

For the top crust:

5 TBS unsalted butter, room temp
¼ cup sugar
¼ cup packed brown sugar
1/3 cup all purpose flour
1 pinch (~1/8 tsp.) salt
½ cup sliced almonds, chopped further into very small pieces

1. In a small bowl, combine the flour, sugar, brown sugar, and salt using your fingers to distribute each ingredient evenly.
2. Add the chopped almonds and again use your fingers to make an even mixture.
3. Add bits of cold butter and toss to coat, then use your fingers to work the butter into the dry ingredients until you’ve got irregularly shaped crumbs.

Finishing and baking:

1. Sprinkle the top crust crumbs and spices evenly over the top of the dough.
2. Place the pan in the oven and bake for approximately 50 to 60 minutes, making your initial check at 50. Remove from oven when a toothpick inserted into the middle comes out clean.
3. Place pan on a wire rack to cool before serving.

And then you eat it!

Saturday, March 8, 2008

Chocolate Chip Cookies

For several weeks, I’ve been avoiding baking cookies of any kind because of the time and labor they require. Already I tend to skimp on my attention to detail and crowd too many cookies onto one sheet, resulting in largely square munchies (whoops). But, having baked loaves and cakes for a few weeks, I was ready to re-enter the world of cookies, if only for an afternoon.

This recipe does not require much time, which makes it an excellent choice for post-work baking. Its quickness can be attributed to 1) the simplicity of the recipe, and 2) the fact that the recipe only produces 2 dozen cookies total. If you’re going to double the recipe, make sure you have enough chocolate – I used about 9 oz on today’s batch alone, and using twice that can amount to a significant expense if you’re using snobby (but delicious) high-quality chocolate such as Scharffen Berger or Green & Black’s.


The cookies are sizeable and attractive, in addition to being extraordinarily tasty. I took the base recipe from Neiman Marcus, though I have no idea why a company that produces high-end clothes would also create anything as homey as a chocolate chip cookie. I made two main alterations. The first was extremely small, simply reducing the recommended amount of instant espresso powder because I believe a chocolate chip cookie should taste more like chocolate than coffee. The second alternation I took from Dorrie Greenspan, who always recommends buying chocolate in solid bars and chopping it yourself instead of using prepackaged chocolate chips. It is often a pricey substitution, but I have found it worth it in each instance of employing the practice.

I have re-written the directions that correspond with the recipe in an attempt to make them more intuitive and tailored to the individual who lacks an electric mixer. It should also be noted that the cookies are best when enjoyed while still cooling, as they are chewy and moist without being unpleasantly doughy. When packed in an airtight container and consumed later, the cookies tend to crisp up a bit, but in an enjoyable way rather than tasting stale. However, if you wish to bring back the chewy texture, simply pop it in the microwave for ~12 seconds (depending on the microwave), or until the chocolate is once again melty and the cookie breaks softly instead of cracking when you break it.

Modified Neiman Marcus Chocolate Chip Cookies


Ingredients:
½ cup (1 stick) butter, softened

1 cup light brown sugar, packed
3 TBS granulated sugar
1 large egg

2 tsps. vanilla extract

1 ¾ cups all-purpose flour

½ tsp. baking powder

½ tsp. baking soda

½ tsp. salt

1 tsp. instant espresso powder

1 ½ cups (~9 oz.) chopped bittersweet or semisweet chocolate (I prefer bittersweet)


Note: Instant espresso powder is NOT the same as instant coffee, which is much coarser in texture and in taste. If you cannot find instant espresso powder, I would recommend skipping this ingredient rather than using instant coffee as a substitute.

Directions:


1. Preheat oven to 300 degrees F. Cream the butter with the sugars using a wooden spoon, making sure to break up all the lumps in the brown sugar. Mix until homogenous.


2. Beat in the egg and vanilla extract with the wooden spoon. Add espresso powder and mix until evenly distributed.

3. In a separate bowl, combine flour, salt, baking soda, and baking powder with a wire whisk or a fork.


4. Slowly add the dry ingredients to wet ingredients in 3 parts, mixing each addition with the wooden spoon until just combined.

5. Use a rubber spatula to gently incorporate your chopped chocolate bits into the dough.


6. Line your baking sheets with parchment paper.

7. Using a teaspoon and your hands, form large, rounded lumps of dough (~2 TBS each – it should feel like a small handful when rolling, about the size of a ping pong ball) and place them on your baking sheet ~ 3 inches apart.


Note: Make sure to give the cookies the proper space, as they will expand.


8. Flatten each ball with the flat part of your palm.


9. Bake for about 20 minutes or until cookies are starting to lightly brown at the edges.


Note: If you want your cookies soft and chewy rather than crispy, do not let the tops of the cookies turn golden. Once you remove the cookies from the oven (they may look slightly underbaked at the “golden on the edges” point in baking), leave them on the hot sheet for a few minutes to let them continue cooking.


10. Using a metal spatula, remove the cookies from the sheets and place them on a wire rack to cool
.

Yield: 24 cookies

Friday, March 7, 2008

The Green Arrow, The Green Lantern, and The Green ... Apron?

There's an interesting mental dichotomy that develops when you find yourself in a position to call whatever you do from 9 to 5 your "day job." This implies what whatever it is you're doing, there's something else you secretly you wish you could do and be paid for. If you run into someone who loves his job, he'll just call it work, perhaps even with an enthusiasm you find slightly alarming. This may cause you to think to yourself, "What am I doing wrong in my life, that I should consider my daily occupation a means to pay the rent more than a means of personal fulfillment?"

And to that, I say to you, it is time to consider the lives and work of the fabled greats -- our superheroes. Take, for instance, Clark Kent. The guy can fly, but he's in a close-minded world that will only accept him as some sort of freakshow who devotes all his spare time to keeping planes from crashing. Does he like working at the Daily Planet, being bossed around by a woman he'll never have the cojones to ask on a date? Doubtful. Or does Peter Parker like being a lowly photographer at the Daily Bugle? Does the Green Lantern like being a cartoonist? Waitaminute why do they all work for newspapers?

Well, my point is that even fancypants Bruce Wayne would rather be traipsing around beating up bad guys on the dirty streets of Gotham than stuck in meetings overseeing how other people spend his money. So if you spend a great deal of your day eagerly anticipating returning to your "secret life" lived at night, you are not alone. Now I am by no means encouraging anyone to abandon their hopes of someday turning their part-time passion into a full-time profession. But if there are circumstances that prevent you from doing so, I urge you to continue your moonlighting with great relish. Those I've met who are able to maintain this balance are certainly my own personal heroes.

Excuse me while I change into my cape. Ahem.

And so, on to the recipe!

Banana Nut Bread

This recipe from JoyofBaking.com is an impeccable creation, though my photo will not do it justice. The resulting bread has a rich caramelized taste, which was surprising to me given the use of white sugar instead of brown. Find the recipe here.

Notes:

- This recipe lacks a streusel for the top of the loaf, but I think it's an appropriate omission. The bread is complex enough, between the nuts and the bananas, and the taste holds its own.

- I used an 8 1/2 x 4 1/2 inch loaf pan, which required slightly more attention to the top of the loaf to prevent it from burning. As a general rule, most recipes will tell you if the top of your quick bread is browning too fast, you should make a loose "tent" over the top with aluminum foil. Just put some foil over the bread (with a little space in between the foil and the bread so that the bread is not smothered) and bend the aluminum foil around the shape of the pan. I perform this step with oven mitts on -- if you're removing the still-baking loaf from the oven to create the tent, the loaf pan will be very hot.

- The recipe directs you to toast the nuts prior to baking, but this is a delicate step, as the nuts can easily burn. Because I am lazy, I skip it entirely, and have not found the resulting bread to be deficient in any way.

- Storage: If you are serving this bread the day after baking, simply wrap the bread tightly with plastic wrap the day before and leave it on the counter at room temperature. I find that refrigerating it for a day does not yield benefits proportionate to the cost of having to warm it up when serving.

- Serving suggestions: The dense nature of Banana Nut bread lends itself to being cut into thick slices and then cutting each slice in half prior to serving. Some eat it with cream cheese, but I like it plain.

Tuesday, March 4, 2008

Coffee Cake v 1.0 Aftermath

So while I anticipated the office reaction to the cake would be one of "Well at least it's sweet and I didn't pay for it" dismay, the responses were overwhelmingly favorable. As it turns out, the molten layer, once it has cooled, becomes much less obtrusive (albeit still jarring). Here are my goals for the next time around:

- Create a proper, crumbly streusel
- Eliminate the molten sugar layer while retaining some of the brown sugar richness of flavor
- Make it clear to everyone at the office that a coffee cake may actually contain no coffee whatsoever, but is often so named for its role as a pleasant accompaniment to the beverage

Sunday, March 2, 2008

Baby’s First Coffee Cake – An Experiment In Terror

Every bakery, whether situated far within the reaches of your daydreams or just down the street, requires a few staple items. I have established that coffee cake should be one of mine. Of course, prior to today I had never made a coffee cake. For days, the tiny rat of my imagination has been running endlessly on the “what should I put in my coffee cake” wheel inside my head.

Here are the parameters I have chosen so far.

- There should be no fruit
- The cake should be simple and tasty and largely plain, rather than loaded down with spice or gimmicks
- Streusel is a necessity

Now, one of the best parts of having a fantasy bakery rather than a real one is that you can afford to make mistakes. Imagine the pressure of having your own establishment. When I allow my mind to wander off into this Let’s Just Say I Have This Bakery theoretical land, I often fancy myself having many regular customers. And how would they feel if they came in to order their favorite coffee cake, only to have it replaced by one that was (in theory) far more creative and exciting, but (in practice) turned out to be nothing more than a self-indulgent experiment?

Thankfully for me, I have no such adoring public. This freedom naturally lends itself to the frequent occurrence of what is known in my family as an Experiment In Terror. This term simply refers to a cooking adventure that you hope will turn out well, but just in case it doesn’t, the name itself is a built-in disclaimer. No shattered hopes here!

So after consulting a few websites (and taking a base recipe from epicurious.com which you will see modified in its EIT form below), I took a stab at it. One should note that this is not the final recipe product, but only one of many iterations. I’m including the recipe for the sake of documentation. After all, the cake’s overall taste was exactly what I wanted. My only problems were that I 1) executed the streusel very poorly and instead made a sort of paste on top that hardened into a crust, and 2) because of my poor streusel execution, I ended up with a molten layer of brown sugar and spices in the middle of my cake. If only that layer had been thinner, it might’ve actually been novel and welcome. Instead, it was a little jarring and somewhat resembled maple syrup. I’ll have to think about that one.

Coffee Cake v 1.0

Ingredients:
1 cup sugar
½ cup butter, room temperature
2 large eggs
1 teaspoon vanilla
1 teaspoon almond extract
2 cups flour
1 teaspoon baking powder
1 teaspoon baking soda
½ teaspoon salt
1 cup sour cream
½ teaspoon allspice

Directions:

1. Butter an 8 x 8 x 3 inch baking pan and preheat your oven to 350 degrees F.
2. Cream butter and sugar in a large bowl.
3. Add eggs and extracts; beat well.
4. In a separate bowl, whisk dry ingredients (flour, baking powder, baking soda, salt, allspice) to combine.
5. Mix ½ of the dry ingredients into the butter mixture.
6. Mix sour cream into the butter/dry ingredient mixture.
7. Mix remaining dry ingredients into the larger bowl.
8. Bake for approximately 50 to 60 minutes, making your initial check at 50. Remove from oven when a toothpick inserted into the middle comes out clean.
9. Place pan on a wire rack to cool before serving.